To add a new agent to your vSUITE solution, follow the steps provided below. Important: missing or not completing any of the steps provided may result in the ACD agent not operating as expected.
- Configure vSUITE with an Administrator from your Rainbow company.
- Create a Rainbow member for your ACD agent.
- Add the Administrator form your Rainbow company to the New Rainbow Members contact list.
- Assign a vSUITE ACD license to the new Rainbow Member.
- Create & Configure the new vSUITE ACD agent.
- Wait for your new agent to become active.
Step 1 – Configure vSUITE with an Administrator from your Rainbow company.
Open the vSUITE administration portal

From the menu, select Settings

Scroll down to the section labelled Rainbow Settings
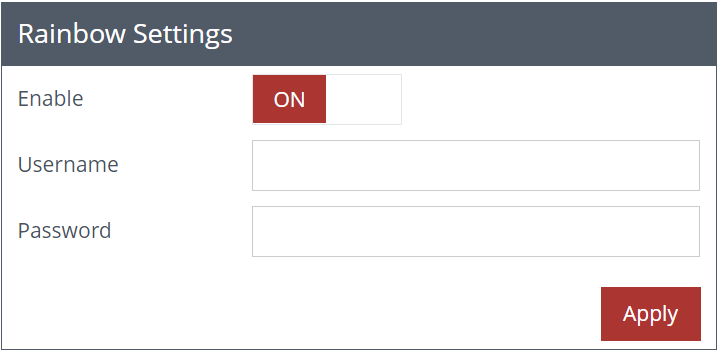
Provide the email address and password of the Rainbow company administrator and click Apply.
Note: The ACD Service must be restarted for the Rainbow Settings to take affect.
Step 2 – Create a Rainbow member for your ACD agent.
Open Rainbow from your desktop or browser and login.
Note: You must be logged in as a Rainbow company Administrator to perform the actions outlined below.
Note: The new member will require an extension to be assigned if they are required to accept ACD calls directly via Rainbow
Note: vSUITE ACD Agents require a Rainbow Enterprise license.
The following link provides full details on how create and configure a new Rainbow member.
https://support.openrainbow.com/hc/en-us/articles/4407688115986-Configure-company-members
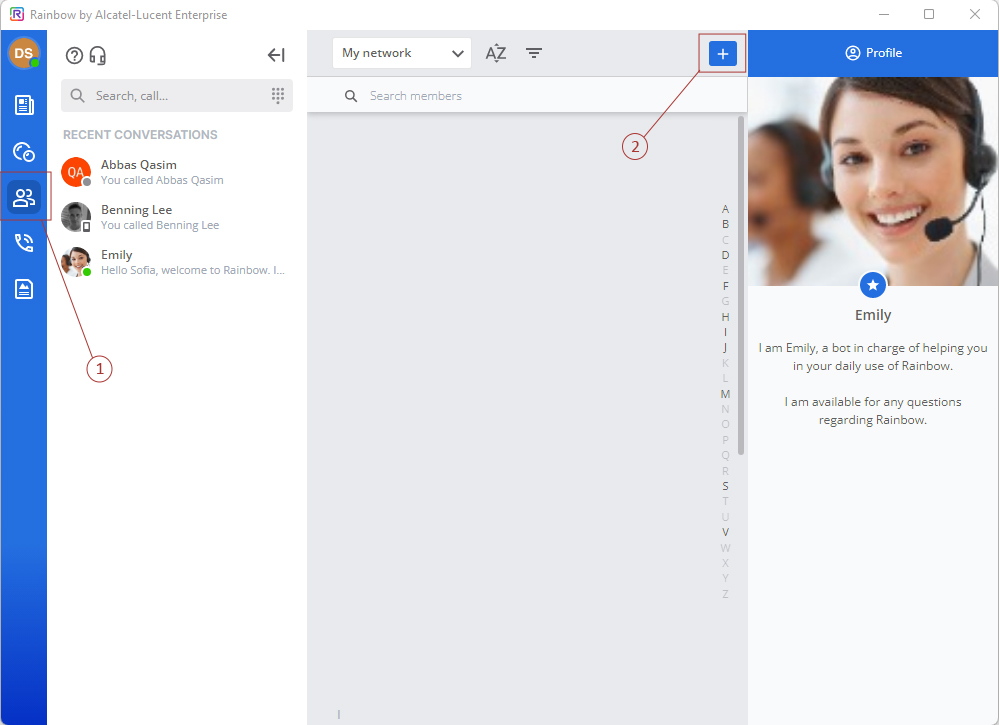
Step 3 – Add the Administrator from your Rainbow company to the Rainbow Members contact list.
Firstly, open Rainbow from the Members desktop or Browser.
1) Select contacts from the left-hand menu
2) Select the add contact button from the top of the screen
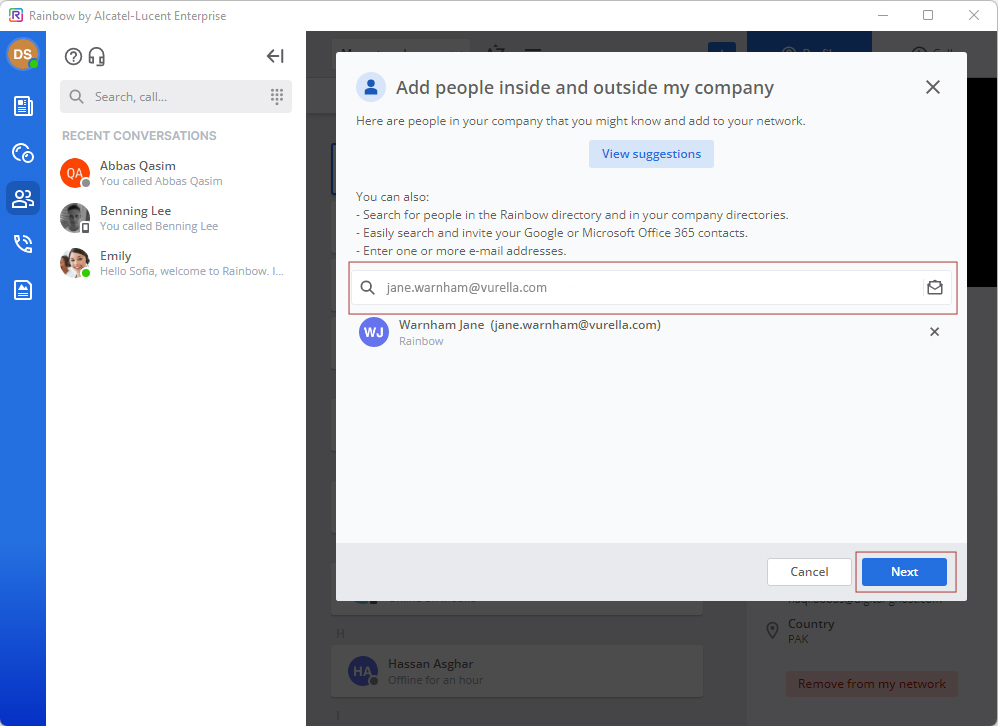
Next, enter the email address of the Rainbow company Administrator that you provided back in Step 1, then click Next.
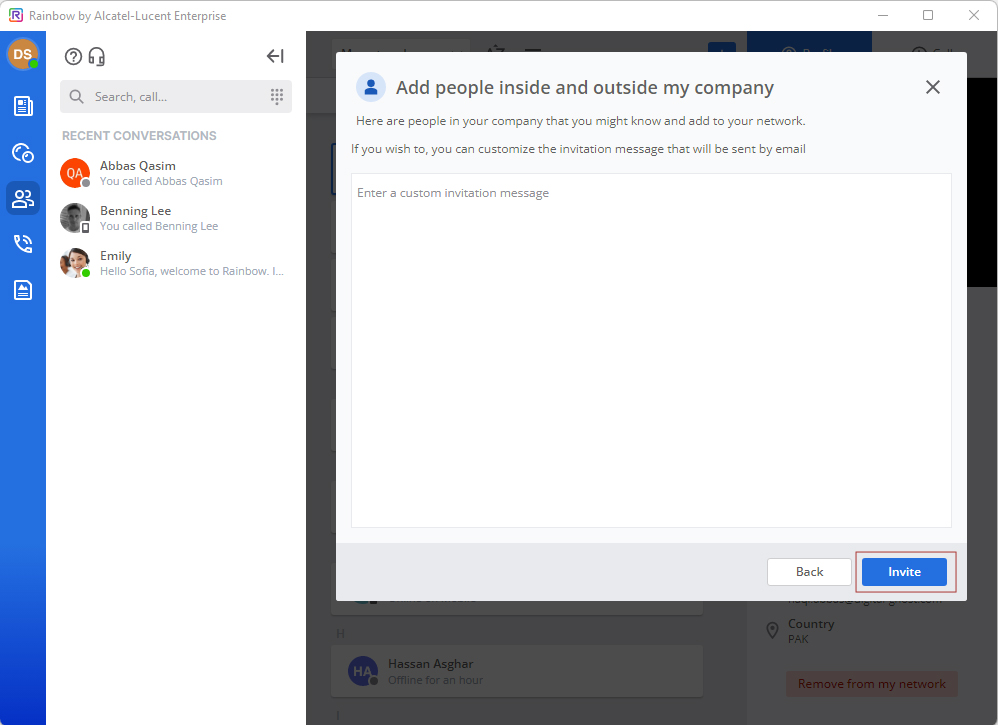
Finally, click Invite. The administrator will now be added to the Rainbow members contact list.
Step 4 – Assign a vSUITE ACD license to the new Rainbow Member.
Open the Vurella Apps Portal using the link below
https://rainbowapps.vurella.com

Login to the Rainbow Apps Portal using the Administrator credentials you supplied in Step 1.
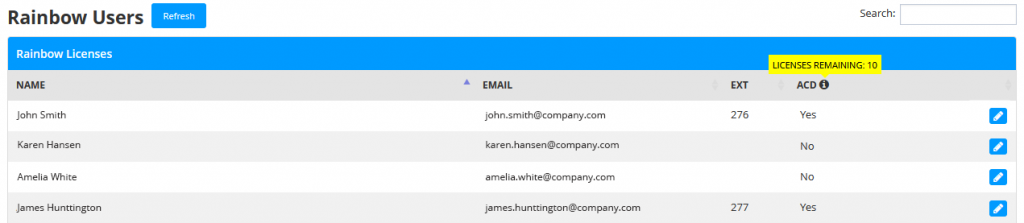
Firstly, ensure you have licenses available by clicking the information icon as shown below.
Note: If you do not have sufficient licenses please contact the Alcatel-Lucent business partner who provides your Vurella solutions.
Note: If your new Rainbow member does not appear in the list, click Refresh to re-synchronize your Rainbow Company members.
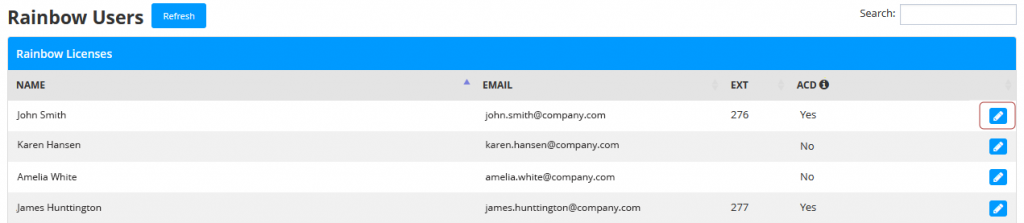
Next, click the edit button next to the member for whom your wish assign a vSUITE ACD license.
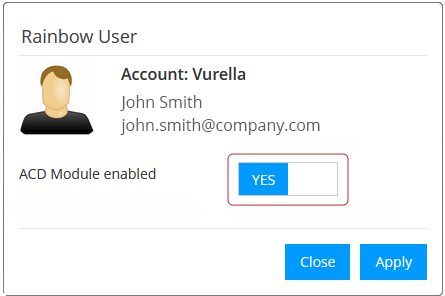
Finally, from the following screen click the switch to enable the ACD Module, then click Apply.
Note: Note: By enabling the ACD Module you are consuming a vSUITE ACD license. If you wish to reinstate this license in the future, you can do so by disabling the ACD module for any user that is no longer required to receive ACD calls via Rainbow. After disabling the ACD module for a selected user, your available licenses will increase by one.
Step 5 – Create and Configure the New vSUITE ACD agent.
Open the vSUITE administration portal
From the menu, select System Users
From the Users Screen Click Add new

Next, provide the details of the new ACD Agent.
- User Type = ACD Agent
- First Name = User’s first name
- Last Name = User’s surname
- User ID = A unique numeric ID that can be used to identify the agent
- Password = A suitable password used by the user to login
- Department = Not Required to be selected for ACD Agents
- Phone Extension = Extension number of the User’s Desktop handset
- Nomadic Extension = Extension number associated with User’s Rainbow account
- Avatar = A suitable image to represent the agent from the Wallboard and Supervisor.
- Enabled = Yes (No Disables the agents account and prevent the agent from logging in)
- Queue Login/Logout = Optional, determines if the Agent can login and out of queues.

Before assigning skills to the agent, you must Click Apply.
Next, Assign the appropriate skills to the agent. Skills specify the queues the agent will be part of.
- User Skill = Select the appropriate queue
- Wrap-up Time = Leave as ‘0’ to use the queue wrap-up time or override the queue wrap-up time by providing the number of seconds
- Auto Logout = ‘Yes’ automatically Logs out or set the agent unavailable if they fail to accept an ACD call which is offered to them
- Skill Level = Select the agent’s proficiency for the selected queue. (Only applicable if skill-based routing is selected for the queue)
- Available = ‘Yes’ specifies the agent should be made available for the selected queue when they login.
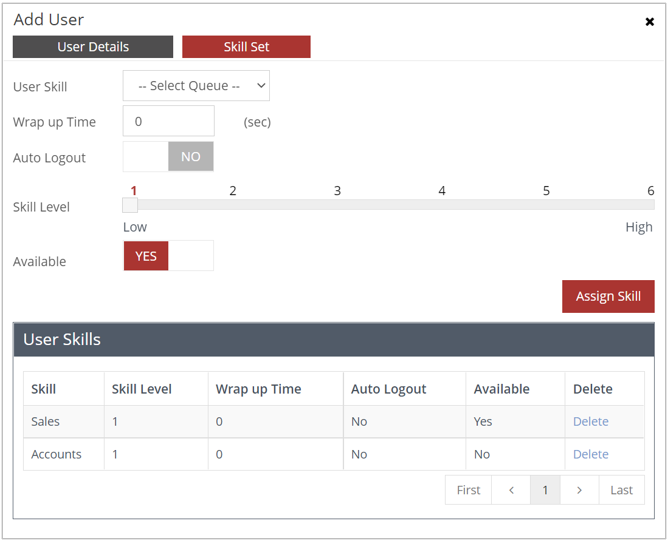
Click Assign Skill. The skill will now be assigned to the agent and displayed in the list of User’s skills.
Step 6 – Wait for your New Agent to become Active.
vSUITE synchronizes new ACD Agents with Rainbow Members every 15 minutes. This is an automatic process that will occur without any required actions.
Note: New ACD Agents will not be able to login until the synchronization has performed.
Note: To force a re-synchronization, the ACD can be restarted, but be aware this will disrupt calls arriving into your call center.