To add a User to your vSUITE solution, follow the steps provided below. Important: missing or not completing any of the steps provided may result in the ACD system not operating as expected.
- Create a user in vSUITE administration portal.
- Configure user details.
- Configure user skill set.
Step 1 – Create a user in vSUITE administration portal.
Open the vSUITE administration portal
From the menu, select System Users

From the System Users Screen select Add New+
Next, provide the details for the user
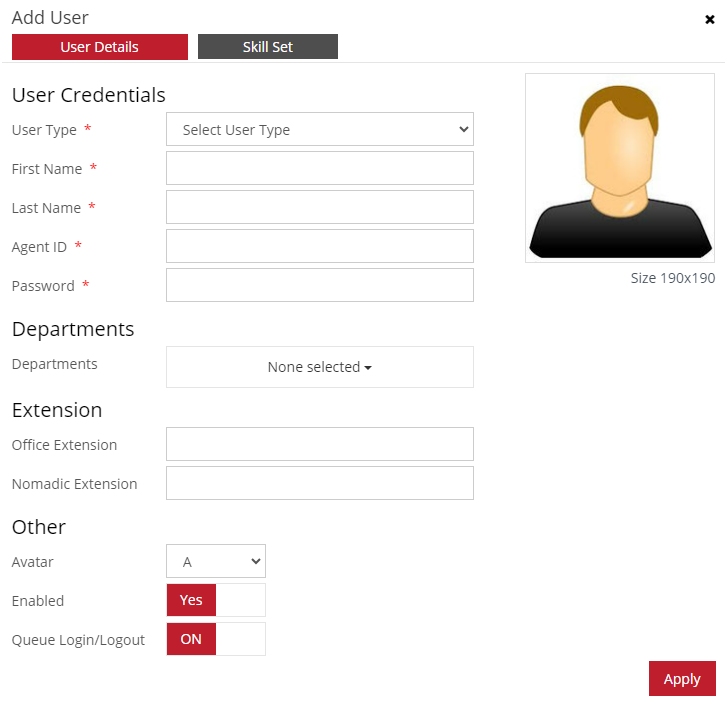
- User Type = Select whether this user is an ACD agent or a Console user.
- First Name = The user’s first name.
- Last Name = The user’s last name.
- Agent ID = The Agent ID is used to log into vConnect, Rainbow dock and Web console. This is usually the agent extension but can be any alpha-numeric input.
- Password = The agent’s password.
Departments
- Departments = Select one or multiple departments the agent belongs to.
Extension
- Office Extension = This is the agent’s physical office phone extension.
- Nomadic Extension = This is the agent’s nomadic extension assigned in the OXE/OXO. This can be a physical device but it is recommended to use this for a Remote extension/Any Device.
Other
- Avatar = Select avatar type A or B that the user identifies with.
- Enabled = This enables or disables a user.
- Queue Login/Logout = If this setting is OFF, the agent is not allowed to logout/make themselves unavailable from the assigned queues.
Select the Apply button.
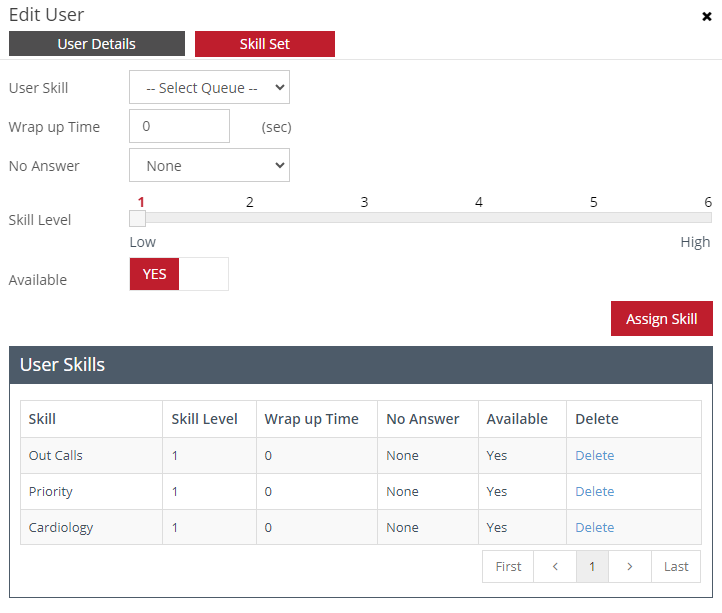
Step 2 – Configure Skill Set.
Provide User skill details.
- User Skill = Select the queue the user will be assigned.
- Wrap up Time = The number seconds the user has to update call details after a call ends and before a new call is presented.
- No Answer = This configures the action if an agent does not answer the call. Available options are to make the agent unavailable or log them out.
- Skill Level = If a queue has skill based routing enabled then this level is used to prioritize call routing.
- Available = This configures whether the agent is available/unavailable for the selected queue.
Select the Assign Skill button. This will add an entry to the User Skills table.
You have successfully created and configured a User.