To add an outbound schedular to your vSUITE solution, follow the steps provided below. Important: missing or not completing any of the steps provided may result in the ACD system not operating as expected.
- Create a schedular in vSUITE administration portal.
- Configure schedular sessions.
Step 1 – Create a schedular in vSUITE administration portal.
Open the vSUITE administration portal
From the menu, select Schedulers
From the Outbound Schedulers screen select Add New+
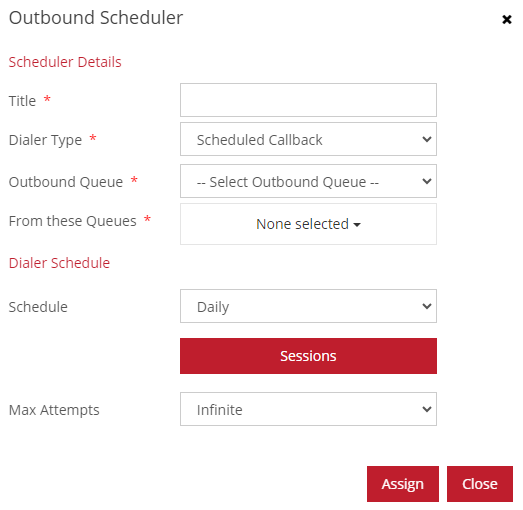
Next, provide the details for the scheduler

- Title = The Title that uniquely identifies the Scheduler.
- Dialer Type = The dialer type can be a Contact List, Scheduled Callback or Abandoned Calls.
- Outbound Queue = An outbound queue needs to be created under the Queues menu in order to proceed. This will be used to configure parameters required by the system to make outbound calls. The agents associated with that queue are used to make the outbound calls.
- From these Queues = This option is only presented when selected dialer type is either Scheduled Callback or Abandoned Calls. This option configures which queue’s scheduled or abandoned calls are handled by this scheduler.
Contact List: These settings are only applicable if dialer type is Contact List
- Contact List = Select an excel file with the list of contacts that need to be called.
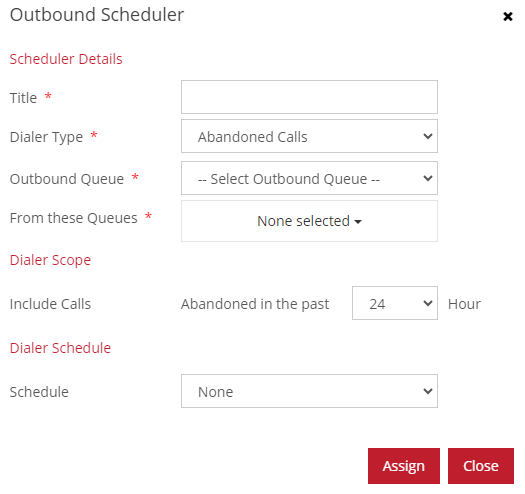
Dialer Scope: These settings are only applicable if dialer type is Abandoned Calls
- Include Calls = Select the number of hours in the past that abandoned calls need to be called back.
Dialer Schedule
- Schedule = Select whether this schedule is run once, daily or weekly.
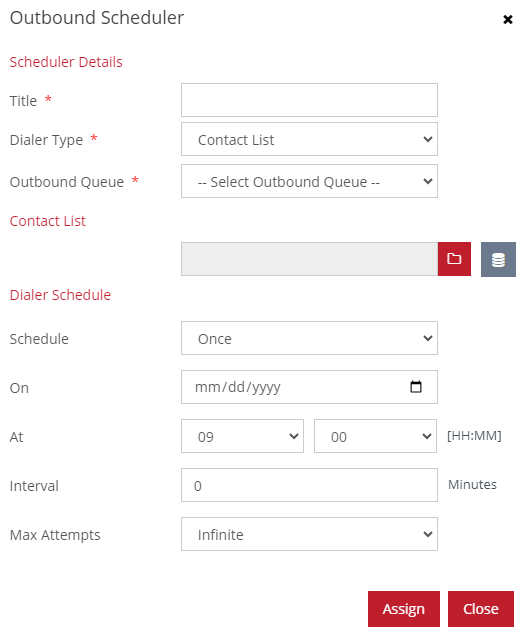
If selected Schedule is Once
- On = Select the date to run this schedule.
- At = Select the time to run this schedule.
- Interval = The interval between retries
- Max Attempts = The maximum number of attempts to make.
Step 2 – Create schedular sessions.
If the selected Schedule is Daily or Weekly
Select the Sessions button.
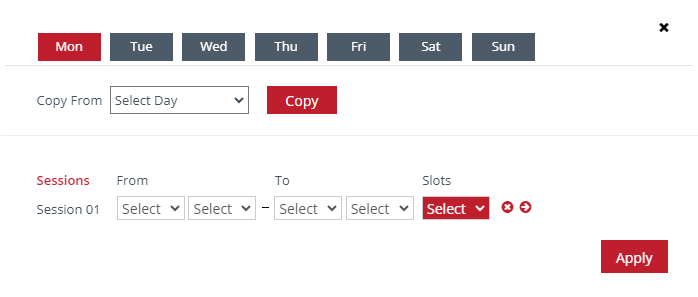
Next, configure the session for each day if schedule is Daily.
- Copy From = copy session details from another week day. This helps in reducing manual configuration for each day.
- Sessions = Enter the time during which the schedular is to run. Slots define the number of calls that can be scheduled for callback during this session.
Select the Apply button.
Select the Assign button.
You have successfully created and configured a Scheduler.