To add a Queue to your vSUITE solution, follow the steps provided below. Important: missing or not completing any of the steps provided may result in the ACD system not operating as expected.
- Create a Queue in vSUITE administration portal.
- Configure service hours for the Queue.
- Configure public hours for the Queue.
- Configure In Queue Messages for the Queue.
Step 1 – Create a Queue in vSUITE administration portal.
Open the vSUITE administration portal
From the menu, select Queues

From the Queue Screen select Add New+
Next, provide the details for the Queue
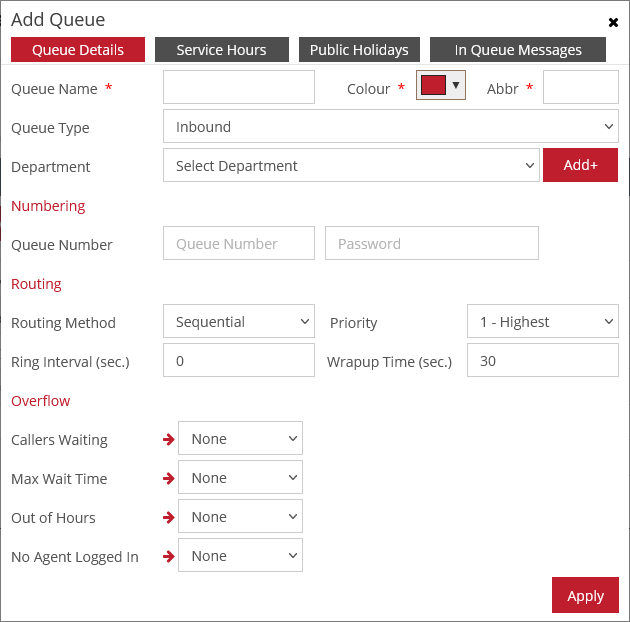
- Queue Name = Name of the Queue e.g. Sales or Accounts.
- Color = The color which will appear in vSUITE applications such as Wallboard and Web Console
- Abbr = Three letter abbreviation for the Queue Name.
- Queue Type = A Queue can be Inbound, Outbound, Console or a Parking Queue.
- Department = The Department associated with this Queue.
Numbering
- Queue Number = This is one of the SIP ports configured under vSUITE settings.
- Password = This is the password of the SIP port if it has one configured.
Routing: These settings are applicable for Inbound and Outbound Queues only
- Routing Method = The routing method that will be used by the ACD system to route calls to the agents.
- Priority = The priority decides which queue will get precedence for calls being answered if a limited number of agents are available.
- Ring Interval (sec.) = The duration for which a call rings on an agents phone before being re-called by the system.
- Wrapup Time (sec.) = The time an agent spends on call-related tasks after ending a call.
Overflow: These settings are applicable for Inbound and Console Queues only. Available overflow actions are None, route to voicemail, route to a number, route to a queue or disconnect the caller.
- Callers Waiting = Overflow action to perform if the number of callers waiting in the queue are equal to greater than the configured number of callers.
- Max Wait Time = Overflow action to perform if the wait time for a caller exceeds the configured maximum wait time.
- Out of hours = Overflow action to perform if a call lands in a queue during out of hours.
- No Agent Logged In = Overflow action to perform if a call lands in a queue when no agents are logged in.
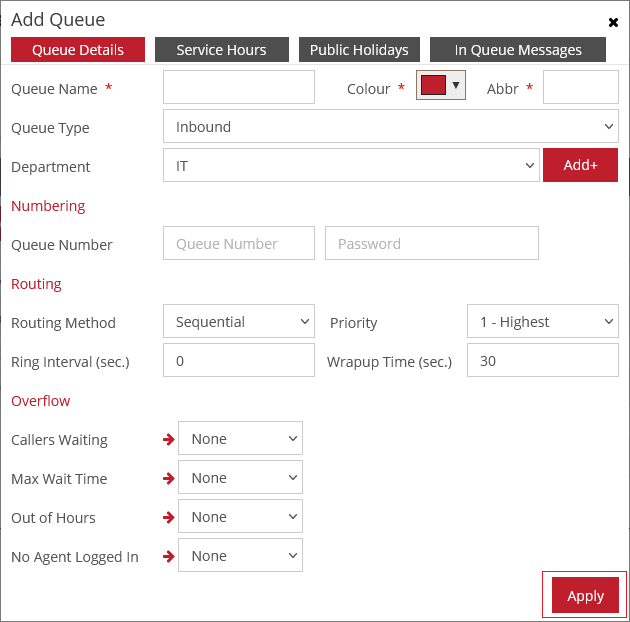
Select the Apply button.
Step 2 – Configure service hours for the Queue.
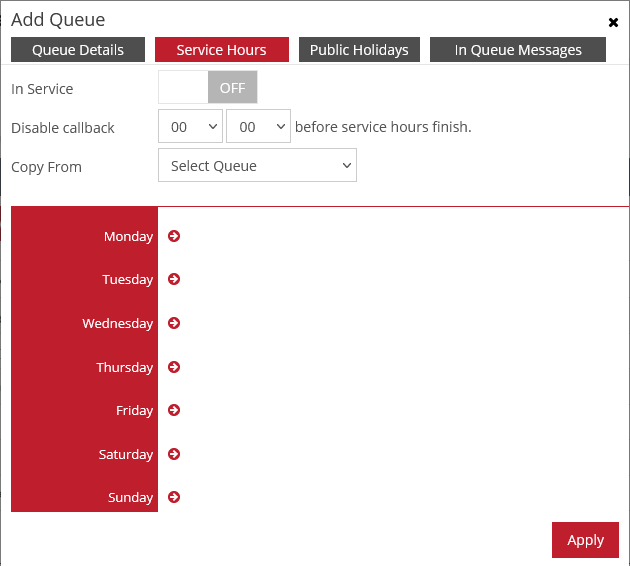
Provide details for the Queue’s service hours.
- In Service = Enable or disable the Queue. If this option is set to ‘OFF’ then this queue will not be available to receive calls.
- Disable callback = The number of minutes or hours to disable the callback option for callers before the service hours end.
- Copy From = If service hours have been configured for an existing queue, these can be copied over to avoid manual re-configuration.
Provide service hours for each day of the week. Two service hour slots can be configured for each day. Not providing service hours for one of the days results in the queue not being available on that day
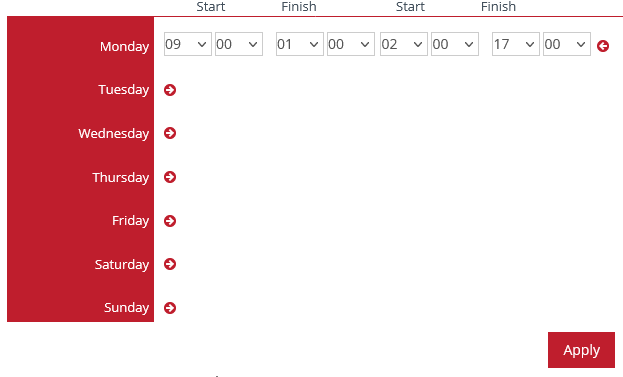
Once the days have been configured press Apply.
Step 3 – Configure Public Holidays
Click on the Public Holidays Tab.
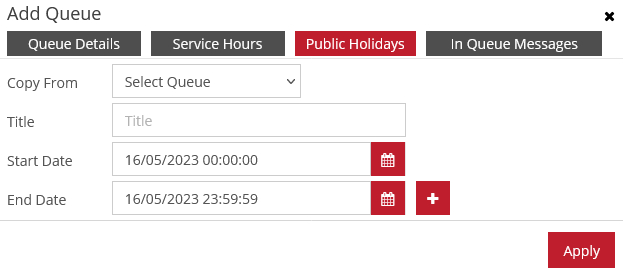
- Copy From = If public holidays have been configured for an existing queue, these can be copied over to avoid manual re-configuration.
- Title = Title of the Public Holiday e.g. Christmas.
- Start Date = The date on which the holiday starts.
- End Date = The date on which the holiday ends.
Press + to add the holiday.
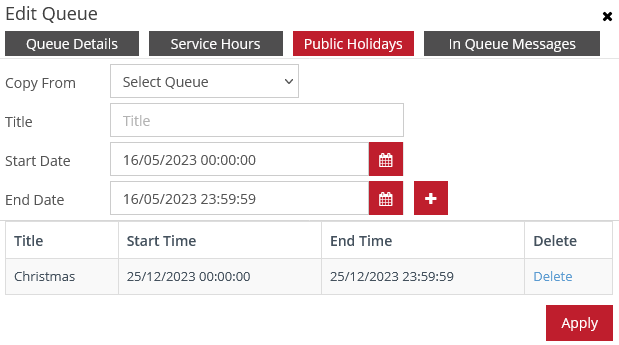
Enter all the holidays and select Apply.
Step 4 – Configure In Queue Messages
Select the In Queue Messages Tab
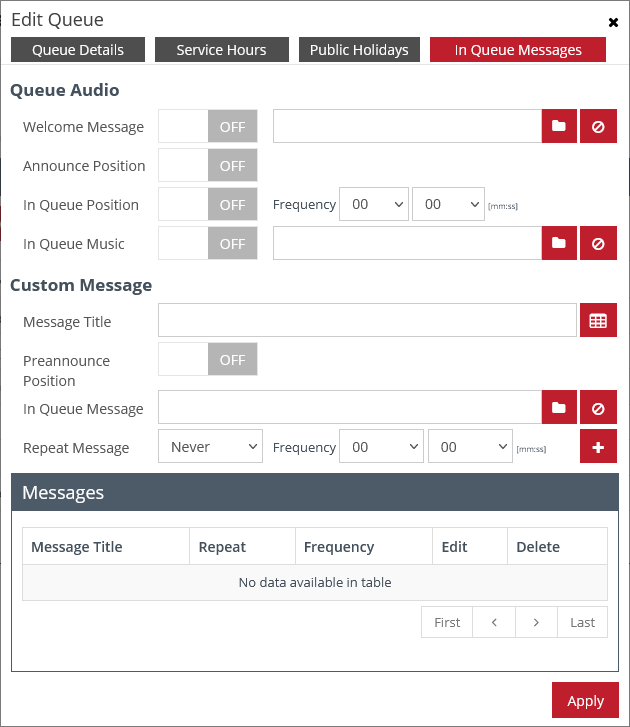
Queue Audio
- Welcome Message = Enable or disable the Welcome message for the queue. If enabled an audio file needs to be provided. An audio file can be uploaded or the built-in Text-to-Speech engine can be used to generate an audio for the welcome message.
- Announce Position = Enabling this option plays an audio announcing the callers queue position right after the welcome message
- In Queue Position = Enabling this option plays an audio announcing the callers queue position after the configured duration in Frequency.
- In Queue Music = Enable or disable In Queue Music (Music On Hold). If enabled an audio file needs to be provided.
Custom Message
- Message Title = The title of the custom message.
- Preannounce Position = Enabling this option plays an audio announcing the callers queue position before playing the custom message.
- In Queue Message = The message to play while the caller is waiting in the queue. This can be an advertisement, a public service message or a custom message for announcing a callback option.
- Repeat Message = The number of times the message should be repeated and with what frequency.
Select the + to save the custom message and then select Apply
You have successfully created and configured a queue.